Showing posts with label tutorial. Show all posts

Monday, 13 May 2019

Polkadoodles - Gift Bag Tutorial

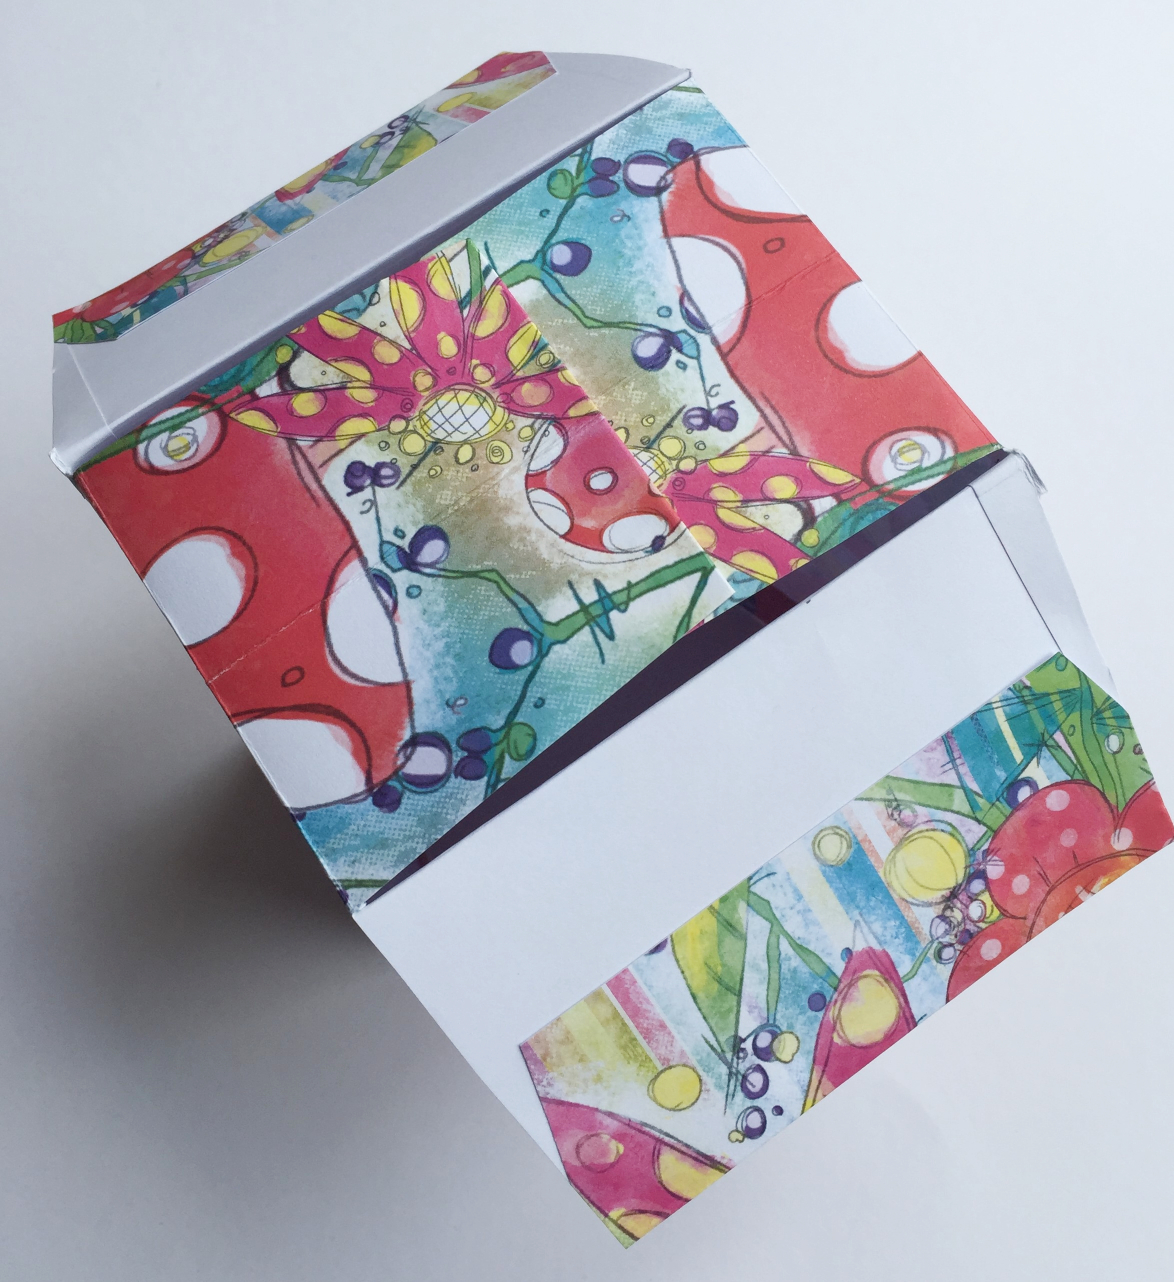
I always need a gift bag (plus I over-indulge on sellotape if I wrap anything!) so I thought I'd show you how you can make one from two sheets of A4 paper - I've used the PosyDoodles Splash of Summer collection from Polkadoodles

Supplies
Two sheets of A4 thick paper from PosyDoodles Splash of Summer
PosyDoodles Basic Tag dies
Hole punch or eyelet setter
Ribbon
Glue
Ruler
Bone Folder
Pencil
Scissors
Double Sided tape or Sellotape

Step 1:  Measure and score your paper as shown starting from the top and working down - the extra bit on the left hand side is for gluing and the extra bit at the bottom is for strengthening the gift bag's bottom if you are adding something with weight.  Repeat this for the second sheet of paper exactly the same.


Step 2:  Score using a bone folder on the lines and fold as shown - I also folded everything except the top, side and bottom edges the opposite way too so that it provides a bit more manipulation when you're constructing the bag.


Step 3:  Glue the sheets together using the little flap on both - your bag should look a bit like the one below.


Step 4:  As you can see, I snipped a little part of each meeting corner away just so it wasn't too bulky when I constructed the bag.  Also, snip a small V across the each corner of the base as shown - you will have 4 V shaped cuts.  This helps when folding.


Step 5:  Glue the shorter sided flaps together in the centre for the base and once reasonably dry do the same with the wider sides.  By doing it in this order, you still have a neat base once finished.


Step 6:  Your base will look like the photo below.  Once all your glue has dried properly, you can then begin to shape the sides.  If you pinch the top of the bag and push the sides in, they will provide a gusset.


Step 7:  I next selected a topper sheet from the collection and cut one out using the tag dies.  The white bit at the bottom of the tag is where I'm going to write my sentiment.


Step 8:  I punched two holes each side with an eyelet setter and threaded my ribbon through and added the tag to one side.  I secured the ribbon with a small piece of double sided tape and then a strip of sellotape to make sure it was secure.

Friday, 5 September 2014

From The Heart Stamps - September Blog Hop!

Welcome to our From the Heart Stamps blog hop; the theme for September is For the Bird(brains). As you hop along, please leave a comment on each blog as one random commenter will be selected from each stop on the blog hop to win an image of choice from the FTHS store. Plus one commenter on the From the Heart Stamps blog will be selected to win a $15 gift voucher to the store!

And that's not all! Have you ever had a great idea for a Birdbrain image? Well, this is your chance! One lucky winner randomly selected from all the comments left on the FTHS blog will be selected to work with Faith to design a Birdbrain image!


As you hop from blog to blog, if you like the look of the tutorial you can recreate it and don't forget to use a FTHS and your favourite Birdbrain image - just link your blog up with the InLinkz code at the bottom of each blog post as a random link will be picked to win my creation!

I've made a simple Tee-Pee card using one of my favourite FTHS images - Birdbrain Balloon - and coloured it with Promarkers and then cut it out.


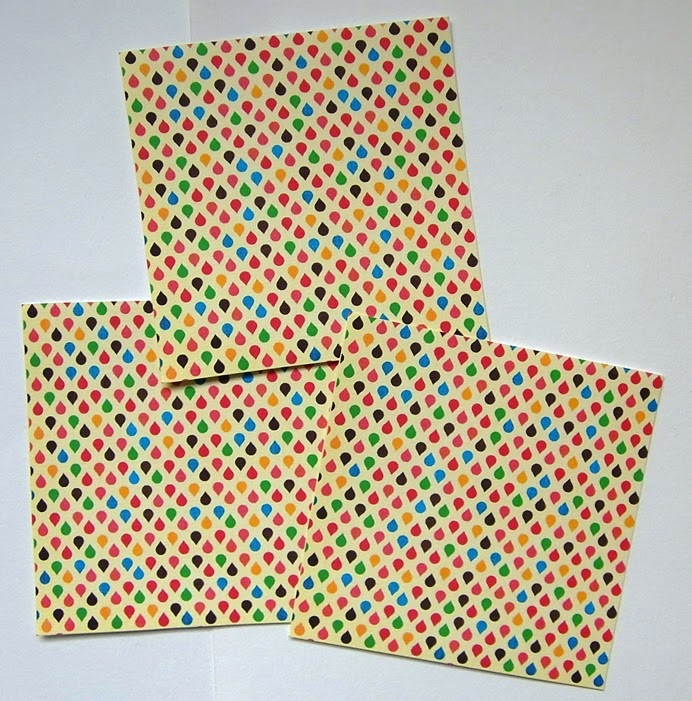
Next, I printed Sassy Designs - Primary onto some thick cardstock - you will need three 11cm square peices. Sign up to the newsletter on the website as you'll get to hear of the fantastic sales where the digi paper packs are reduced to 99cents!

Score diagnally across each of the three squares to create a valley fold on the non-printed side. I've also inked all the edges with a brown Whispers inkpad (cheap and cheerful!)


To construct the Tee-Pee, lay the three squares as shown - overlapping each one. Double check that it will all fold together before you glue it, just in case (you can always trim the edges if needed to make it fold flat)


Stand the card up and embellish as desired with your favourite FTHS image! I've also added glossy accents to the balloon and eyes. And I've replaced the balloon string with an offcut of bakers twine. To keep the card shape when its stood up, I've added a button which has a foam pad underneath so that the flap rests on it and keeps it all closed. Alternatively, you can add a brad.


Back to the blog hop! If you have arrived from Joanna, you are in the right place, if not why don’t you start on the From the Heart Stamps blog, so you don’t miss anything. Don't forget to leave me a comment before you hop over to Angela to see what she's created.

Thanks for hopping with us today. The hop will end on Sunday 14 September at 6am, EST. Winners will be posted on the From the Heart Stamps Blog on Wednesday 17 September.

Good luck!

< div class='InLinkzContainer' id='438433' > An InLinkz Link-up< !-- end InLinkz script -->

Friday, 26 April 2013

Polkadoodle Tutorial - Flower Pegs!

We've started a new feature over on Polkadoodles and the Design Team will be sharing some tutorials just before the challenge post goes live each Friday.  I'm starting the ball rolling with a rather simple but pretty way of using pegs!

You will need the following:

Sugar Birdies cd
6 wooden pegs
Glue
Scissors
1 A4 sheet of thin white card
1 A4 sheet of clear vellum

From the Sugar Birdies cd, print off one of the flower sheets so that you get 4 sets on a sheet of A4 card.  Do the same with a sheet of clear vellum.  Put the card back through your printer and print a contrasting block colour on the reverse.
 
Cut out one set of the card flowers (6) and two sets of the vellum flowers (12)


Next, layer up the card and vellum flowers - keep the vellum layers at the top


Gently curl the petals to give them some dimension


 And then glue to the pegs - make sure you don't glue the bit where the spring goes!

 
You could add a button to the centre and thread some twine through - I was lazy and couldn't find any black buttons!

I'd like to enter the following challenges:

Shelly's Images:  April Showers Bring May Flowers
Crafting For All Seasons:  No Stamps Allowed
Hambo Hoedown:  Anything But A Card
Creative Card Crew:  Handmade Flowers
Unstampabelles:  Anything But A Card

Papers:  Sugar Birdies cd from Polkadoodles
Everything else:  My stash / under the kitchen sink

Friday, 1 October 2010

Polkadoodle Challenge 39 - Fancy Folding

Welcome to another Friday and another Polkadoodle Challenge! This week Dee has set the challenge to be:

Fancy or Interesting Folding

Which can mean a lot of different things! If you are struggling for inspiration, have a look and see what the Polkadoodle Design Team came up with!

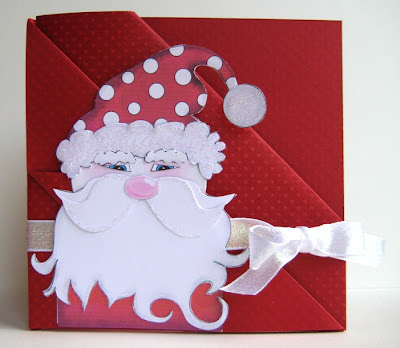
I've used fancy folding to make this gift card holder and because it is so quick and easy to make, I've turned it into a tutorial! I was asked by quite a few people to make a tutorial after last time I made and blogged one of these gift card holders.


I must point out that I am not the creator of this tutorial - it was originally published in Papercraft Inspirations magazine a few years ago and was written by the very talented Enfys - I've just adapted it slightly.

You will need:
An image to add to the front of the gift card
Length of ribbon
One 12x12 sheet of thin card or good quality paper
Bone folder

To start with, I printed the Santa A6 layered shape from Paper Boutique Vol 2 - Creative Christmas (a wonderful cd if you love Christmas!) and cut out all the elements.

I then layered them up - basically you can layer them however you want as it is not a traditional decoupage shape. Add glitter glue and other embellishments if you wish at this point or you can save it until you add Santa to the front of the gift card.

Next, I've used a 12x12 sheet of Bazzil Swiss Dots red card and folded it into quarters - use a bone folder to make sure you get nice crisp edges!


Cut to the centre point of the card (as shown) by using the fold as a guide.

Turn the card around (as shown) and fold the top left corner down to create a smaller fold

Next, turn the whole sheet over and on the opposite side of the first folded corner, fold the whole quarter so that the corner touches the centre fold as shown below.


Bring the top left corner across to cover the right hand side. This creates the first 'pocket' on the card.


By bringing up the fold underneath to sit on top of the first 'pocket', this now creates the second 'pocket' on the card.


Simply fold the remaining panel around the back to form an actual card. The hard work is now complete!


Add ribbon decoration to the front - this looks pretty and also adds as a natural closure to the sides of the pockets so any items placed in them will remain there.

I glued the Santa on the main front panel, taking care not to glue where the pockets are otherwise you can't add anything to them!

I've used a 12x12 sheet of card stock but you can use smaller if you wish - just remember that the finished size will be half of what you started with. For instance, 12x12 becomes 6x6 when completed, so cutting a sheet of A4 card up (8x8 square) will turn into a 4x4 pocket card.
If the instructions seem a little daunting, try practicing on a sheet of paper - once you've done it once you'll soon get the hang of it!
Hope you found this useful!
Now back to the challenge - good luck if you enter and you have until Sunday 10 October at 12noon GMT to link your blog post to the Challenge blog. Please remember to follow the brief and not to enter your Polkadoodle creation into more than 9 other challenges.
  • Card stock: My stash
  • Image: A6 Santa from Paper Boutique Vol 2 - Creative Christmas
  • Ribbon: My stash

Sunday, 30 May 2010

T-shirt Transfer Tutorial

Here is the t-shirt transfer tutorial I promised! I did try and get it all ready before we went on holiday last weekend but despite spending over an hour trying to sort out the photos, Mr Blogger was just not playing and either kept loosing the photos or putting weird code in their place! Hopefully, this one will work!

The t-shirt transfer paper was generously sent to me by Photo Paper Direct who asked me to test the product and blog about it! And because I enjoyed making the first t-shirt I decided to turn the second t-shirt into a tutorial!

To begin, take a sheet of the t-shirt transfer paper. It comes in a pack of A4 and you can buy 20 sheets for around £8 (the budget pack is cheaper!) I used a kids plain white t-shirt that I pre-washed (bought 2 from Primark for less than £2). You will also need felt-tips or another colouring medium - do not use Promarkers as these take the surface off the paper. Copics are probably the same. Also, a sheet of greaseproof paper, a domestic iron, a surface that will withstand your iron on the hottest setting (do not use the ironing board!) and of course a digital image!

I used the sweet dino image from Simple Doodles (I'd previously asked permission to use it), decided on the best size and within Word I flipped the image so that when it was ironed onto the t-shirt it would be the correct way round - very important if using wording!

When I came to print the image onto the transfer paper, I selected the correct setting, however I didn't use this for my first t-shirt - I simply printed it as normal and it worked fine!

Here is the dino waiting to be coloured!

These are the felt-tips I used to colour my image - bought from Tesco for around £2.50.

And here, I've started to colour the base colour of the dino. I selected a pale colour to begin with and then built up the depth afterwards. Take care not to 'scrub' at the image as the surface will disintegrate.
I didn't leave enough time for the different colours to dry, so I experienced some 'bleeding' with the red. But I quite like the effect!

Once the image has been coloured cut it out leaving a fine border around the image - if you leave a wide border it will be more noticable once the image has been ironed onto the t-shirt.


Place the image coloured side down onto the t-shirt where you want it to be. You may want to use a small peice of sellotape to keep it in place if its easier. Apologies for the photo being the wrong way!
Now set your iron to its hottest setting and once upto temperture iron the image onto the t-shirt by using small round motions ensuring the whole of the image is covered. Do this for around 2 minutes and the backing paper will turn brown.

Leave the image to cool completely - you have enough time for a cup of tea and a hob nob! Once completely cool, carefully peel the backing paper from the image. Take care to peel it away in one full peice otherwise you may damage the image underneath.

If you prefer your transfer to be shiny then you can finish at this point and simply leave the t-shirt for 24 hours before washing it inside out.

However, if you want the image to appear matt, then place the sheet of greaseproof paper over the image and iron it, again on the hottest setting for around 30 seconds. Whilst the paper is still hot, peel it away.

The image underneath is now matt finish.

Leave it all to cool and wash the t-shirt inside out 24 hours later. It can either be tumble dried or left to dry naturally.

And here you have the finished t-shirt modelled by Jacob! He was looking most pleased as I had just bribed him with ice cream and chocolate sauce - after the photo shoot of course!!


If you want to use a pre coloured digital image then the same steps will be followed just without the colouring. I am really impressed as to how easy the t-shirt transfer paper was to use and I have a feeling that I will be buying a pack of the paper as I have more ideas on how to use it! If you want to use it on canvas bags, then Photo Paper Direct also sell them!

From start to finish, the whole process took around 2 and a half hours although I staggered it over 2 days. Please remember to ask permission from the digital artist before their image is used.

Thank you to Photo Paper Direct for sending me the paper to use and for asking me to try one of their products (I feel like I really have made it in the blogging and crafting world!) and also to Trish for allowing me to use her very cute dino!

Friday, 25 September 2009

Tutorial - Digi Colouring with Watercolour Pencils

And here is the second tutorial to accompany this weeks challenge!

My equipment is very basic! These are the watercolour pencils (24) that I use and also the brush felt tips (30). The watercolour pencils can be used as ordinary pencils, but they really come to life when a tiny bit of water is added.

For this tutorial I am colouring Polly Polkadoodle from the Halloween download. I've started with a light and pale layer of colour.

I've now added more definition to Polly's hat by dipping the nib of my pencil into water - I can now spread the colour more easily and also choose which areas I want to leave as highlights.


To build up more intense and darker colours, I've used not only the blues but also greens and purples. I would not use the black at this point as to go too dark too quickly may spoil the overall effect.


The same technique is then applied to her cape. Colour is built up slowly with greens, browns, blues and reds.

Other smaller areas are now coloured.


And only now (below) have I added a tiny bit of black here and there to provide a darker contrast to the colour. However, it is really the colour and it's depth that I want to portray which I feel provides a richer and deeper colour than using black as this can be a very flat tone.


And here are the two images together that I coloured for these tutorials. Same technique applied to both images but different results due to the medium used.


And this is the card I made with the Polly Polkadoodle image. Papers are also from the Halloween download and the little fimo spider is made by me!


Hope you've enjoyed the tutorials and that you will be able to join in with the challenge this week!