Sunday 31 August 2008

All Is Revealed!! Part Deux!

And here are the little thank you books in more detail! I went through the hundreds of photos that we have of Samuel from being a little tiny new born right up to a few weeks ago and I picked out my favourite ones (some you will see repeated on each of the books as I really like the photo!)

Front covers - the sentiments are attached via an eyelet and then fibres or ribbon are tied through the top and through the binding.

First pages - Samuel shown as a tiny baby and then a little bit older


And now around a year old and just before his second birthday holding Jacob


Finally with more recent photos


And the back of the books have been embellished with ribbon.

  • Backing paper: Funky Seasons
  • Embellishments: Various, including: foam flowers, prima flowers, ribbon, gems, acrylic flowers and brads

Saturday 30 August 2008

Arty Girlz Challenge 49 - Summer & It's Bikini Time Again!

Arty Girlz Challenge number 49 is 'Summer'

And because I'd enjoyed making the Minty Madness bikini earlier in the week, and because I have quite a few friends' birthdays in September (and I need to get myself organised with their cards!) I decided to have another go at making the bikini cards.

Both cards are virtually the same so its easy enough to show the front and back of the cards.

And as luck would have it, the freebie Prima flowers that came with the Papercraft Inspirations subscription arrived this week, so I've been getting the flowers out of the tubs and putting them back quite a few times!!


You'll have to excuse the dodgy looking back of the card - looks a little, ahem, untoward doesn't it?!

  • Backing papers: Don't know as it was in the blog candy win from Jozza!
  • Flowers: Prima Esprit orange and yellows
  • Ribbon: From my stash
  • Other Bits: Dovecraft daisy brads, eyelets from Kath, seed beads and acrylic sentiments from a recent magazine freebie

My WIP - All Is Revealed!!

No need to keep wondering what my WIP is! I've made these little bags and matching books as thank you's for the four members of staff in pre-school at nursery as Samuel's last day is 4 September. Quite an occasion as he's attended nursery from being a little 5 and a half month old boy. And he's loved it!

The idea for the bags and books came from watching Anice's recent appearance on telly demonstrating Funky Seasons, and Jozza had made a wonderful black and white bag and book with her youngest daughter in - so thank you Jozza for the inspiration! And also thank you to Lynsey for expertly binding the little books and for the brew!


I tend to associate people with colours and went for a theme based upon the colour collections within the Funky Seasons cd, which, I must say, never fails to inspire me and it must be my most favourite cd!
The template for the bags are on the cd and I printed on the reverse of the card with the contrasting pattern, and they were really easy to make!

For Jade, I went for green and purple.

Kim had pinks and chocolate browns
Nazia, bright summer oranges, lime greens and yellows


And for Rachel, Samuel's key worker, black and whites


I've printed the sentiments on the books onto vellum which read 'Just a little something to say thank you!' and then layered onto the disc. I hand wrote the names on the bags. All the bags and books have been embellished with ribbons and fibres - the books I will show in more detail on another post as this one is already a bit picture heavy!
Rachel has already got hers as she's on holiday for Samuel's last week. She really liked it!
  • Backing paper: Co-ordinating papers from the collections within Funky Seasons
  • Sentiments: Computer generated and hand written
  • Ribbon & fibres: All from my stash
  • Embellishments: From my stash, including heart gems and eyelets (originally from Kath)

Friday 29 August 2008

Carol's Fun Sketch 2 - And Another Nursery Thank You!

Funky Hand DT mate Carol has her second sketch challenge on her blog and here is the design:

And as I still had a thank you card to make for nursery (as Samuel leaves to go to school, Jacob moves up to the pre-school room) and I wanted it to be different to the others, I decided to use Carol's sketch for it.

Still kept the Easter hat theme (Jacob has a habit of screwing his face up as he thinks he's smiling nicely for the camera!) I went for something bright and punchy this time with computer generated sentiments (used chiller font) and ribbon.

  • Backing paper: Printed onto photo paper and from a free download from Crafts Beautiful
  • Sentiments: Computer generated using Chiller font
  • Ribbon: Ric rac from my stash (and Blackburn market)

Thursday 28 August 2008

8 Loo Rolls Later & A Washing Up Liquid Bottle....

It's not always about making cards in my household. Nursery expect the children to make things too. Fortunately, they now give plenty of notice. I've had a month to help Samuel make a rocket for a little competition they were having - who could make the best space rocket in pre-school!

In my defense, it took 2 weeks for the Fairy Liquid washing up bottle to be empty (yep, it just lasted for ALL those dishes) and then I forgot about it. And then remembered on Monday afternoon (deadline Tuesday am), so we got going with the big roll of tin foil, some sellotape and a lot of Scooby Do stickers and gold sticky stars. Thank goodness for Bank Holidays!

The design brief was for the child to make a rocket. I just did the sellotape bit as I didn't trust either child with it (by this point a grumpy and tired but refused to go to sleep) Jacob came downstairs and had to join in. It was Samuel's design and he put all the tin foil on himself.


The boys cut up the crepe paper, added the yellow band around the rocket and then all the stickers. I did the hangy thing (quite badly it turns out as it was rubbish and did not work!) out of silver ribbon.

Looks really good doesn't it? But not as good as the ones that the other children's parents had made. It was obvious that most of the parents had actually made the rockets, either that or there is a scarily high proportion of genius artists / sculptors in that class at nursery. Samuel's Scooby Do Rocket did not win.

Me, bitter? Nah. But Samuel was.

While I Pee - Part 2

And here is the second installment of my current work in progress. Actually, I tell a little lie. I have completed them, but realised you'd not seen the next installment, so here it is!

Any more guesses?! I'll share the finished articles with you over the next few days!


Wednesday 27 August 2008

Minty Madness Mask!

Sometimes I want to make something other than cards and this is usually inspired by patterns or papers or just the fact that I've had an idea and I want to use it. This paper from the new Funky Hand download Minty Madness just screamed at me! And loudly!

So I made a mask! The template has been allowed to froth over to follow the pattern and I've added silver seed beads to the flourishes and swirls. Mint and chocolate coloured organza ribbon has been used for the ties and although the pictures don't really show them, I've made two swirls from dark wire with loose seed beads on - they are attached to the ribbon.


  • Backing paper: Minty Madness download from Funky Hand
  • Ribbon: From my stash (actually from the USA this time and not Blackburn market!)
  • Embellishments: Silver seed beads and wire

Friday Sketchers Challenge16 - New Job!

Over on Friday Sketchers, this weeks challenge, number 16 is:

And here is my take on it! Lola Rose image coloured with watercolour pencils both the image and sentiment layered onto navy blue card and then attached to the backing paper (which I am sure is Funky Hand and I think It's Funky Too cd). The wire has 4 silver seed beads on each side of the flower, and the wire scrolls are attached to the card via thinner wire twists.


Made for Clare as a surprise. Well, it won't be if she reads my blog! So, you aint seen it yet Clare, ok?! Congratulations Clare on the new job!
  • Backing paper: I think It's Funky Too by Funky Hand
  • Image: Lola Rose by Pink Petticoat, coloured with watercolour pencils
  • Embellishments: Handmade by me using wire, seed beads and acrylic flowers

Tuesday 26 August 2008

Daring Cardmakers Challenge - This Way!

Wondering what has happened to me after my Christmas Card rush of recent weeks? Well, no fear, they will be back! Just sometimes I cannot make a Christmas Card with some of the challenges no matter how hard I think especially as some of the papers really lend themselves well to certain challenges! And this one was perfect for the challenge!

Daring Cardmakers Challenge this week is:

it's a dare with a POINT! A nice sharp point, at that!
This Way!
I want to see arrows on your cards - whether big, small, straight, curly, lots or just one arrow

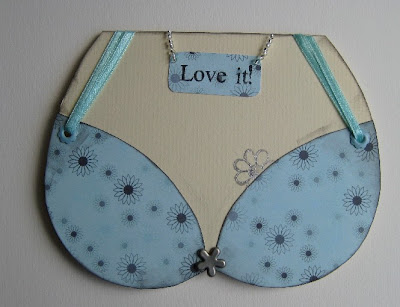
Yes! It's another of my wobbly episodes! It would have been a quick and easy card to make before I decided to cut round the pattern on the backing paper and to make my own arrows! backing paper and sentiment all from Now That's Funky along with my own little doodling and strategically placed acetate!


  • Backing papers & sentiment: Now That's Funky cd
  • Extras: Doodling and acetate

Monday 25 August 2008

Minty Madness Alert!!

It's been launched!!
Time to go all Minty Madness!
Pop over to Funky Hand and have a spend!! You will not be disappointed!
PS My previous post shows one of the papers!

Stamp Something Challenge - Birthday & I've Gone Minty!!

The making of this card for the Stamp Something Challenge coincided with a brand new download from Funky Hand called Minty Madness!! And as minty chocolate (especially mint creme eggs, which, incidentally, they do not make any more grrrr) is my favourite (close second are root beer jelly beans) then you can start to understand how pleased I was to try out the papers!

Onto the challenge, which is:

You are to create something that could be given for a birthday(card, invitation, present, etc), something that would be seen at a birthday(party favor, centerpiece, cake...) or something that reminds you of birthdays in general.


Now this could be for a Birthday Party invite (beach party!) or for a Birthday Card. Personally, I like the idea of a Beach Party invite!

I've used the new Funky Hand Minty Madness downloaded papers (you will be seeing more of these this week!) which have been highlighted with black ink. Eyelets (perfect colour match) from the stash Kath sent me and the ribbon (again another perfect match although the camera has lied a little) and daisy brad from my stash. The stamped daisy is to represent a tattoo and the necklace detail adds a bit of bling!

And yes, the card has a behind!

  • Papers: Minty Madness download from Funky Hand
  • Stamps: Studio G daisy stamp
  • Ribbon: From my stash and no doubt originally Blackburn market!
  • Embellishments: Eyelets from Kath, Dovecraft daisy brad, silver seed beads

Sunday 24 August 2008

Funky Fairy Challenge - Initial Art

Told you my challenges would be non Festive!

The Funky Fairy Challenge this fortnight is to:

create something featuring your initial or your name!
So I did a lion thing! Backing paper printed directly onto card from the Funky Fairy members page (download number 1) along with paper (number 4) for the tag and also the lettering. Also used ribbed (or corrugated) card behind the lettering to give a bit more of a lionish feel! Stamped some footprints too - they are actually cat footprints, but as a lion is part of the cat family, I'm not too pedantic about it! The lion is a Cuttlebug cut and I've super glittered the mane and added wobbly eyes. Rope added around the tag.
See how clever I've been with the letter R?!!
  • Backing paper: Members page downloads number 1 and 4
  • Stamp: Catt-itude stamp from Lakeland
  • Dies: Cuttlebug lion and Sizzix Round-a-Bout alphabet set
  • Other Bits: Jute string from the kitchen drawer

Cute Card Thursday Challenge 24 - Brights!

Would you believe it! Two challenges to date and no Christmas Cards!!! I have a feeling all the ones for this week (with one exception) will be non Festive!

The Cute Card Thursday Challenge 24 for this week is:

to make a card using BRIGHT COLOURS
I'll own up now and tell you that this is a slight cheat as I made this card a week or so ago as a commission for Lisa for her daughters 13th Birthday at the end of the month. But, I thought it was too good an opportunity to miss as I feel it fits the challenge perfectly!
The card is made from my own template and has been directly printed onto from the Now That's Funky cd and the Funky Diva colour collection (sentiment also). The vellum has also been printed on and has been layered. The ribbon (and this is going to be a shock!) I found in my stash and was a perfect colour match! Eyelets from Kath's recent generosity have been added around the edges of the vellum to give it a bit of weight. And I've added 13 pink seed beads to the sentiment and some on the wire attaching it to the handle.

The centre of the vellum flowers also have tiny silver seed beads added.

  • Backing paper & sentiment: Funky Diva collection from Now That's Funky including sentiment
  • Ribbon: From my stash (and I don't think Blackburn market this time!)
  • Other Bits: Seed beads from my stash; eyelets from Kath

Saturday 23 August 2008

Arty Girlz Challenge 48 - Shapes

First challenge ticked off my list!

The Arty Girlz Challenge 48 is:

to add any shapes to your creation
So here is mine! All the circles have been cut from the Fresh Morning Sentiment Backers from Now That's Funky cd along with the actual sentiment. Edges of the card and sentiments have been inked in either pink or black and all have brads holding them on (they actually spin round too!)
  • Backing paper & sentiment: Fresh Morning colour collection sentiment & backers from Now That's Funky

While I Pee (or Work In Progress)

I never knew what WIP stood for, so I decided it would be While I Pee. And then I found out. Heheheheh! Well, its similar I suppose.

These are little somethings that I am currently working on. Expertly bound, I may add, by Lynsey and her super Bind-It All Machine.


Can you guess what they are going to be? Apart from the obvious, little book!

It's Just Like Swop Shop!!

Eeee, I must be mad! But I've joined up to take part in this. All good fun eh??!!

So what are you waiting for - hop on over to JB*JB's blog and sign up!!

Friday 22 August 2008

Inspiration Just At The Right Time!

Sometimes I really have to think about what to do when I've been asked to make a special Birthday card. This was no exception! And I did a lot of thinking!

However, inspiration came from of Kath's card! I'd been told that the recipient likes flowers, so I made a template for a largish flower, cut it from slightly patterned thick paper and then two from vellum. The edges of the black layers were inked with silver and then feathered. The vellum layers were inked with pink, with the top layer cut into individual petals.


Both bows were tied using my little wooden bow maker, with the one on the flower using the wide fuchsia pink satin ribbon and two strands of thin black satin ribbon. And I made the hat pin myself!!

The lacy strip was sent to me by Kath and I added a few gems plus the ones on the sentiment.

Happy Birthday Hayley's Grandma! And Thank You Kath!
  • Backing paper: Dovecraft Charcoal Prints 6x6 paper; transparent vellum
  • Ribbon: From my stash (and no doubt originated from Blackburn market!)
  • Embellishments: Hat pin made by me!
  • Sentiment: Computer generated

Thursday 21 August 2008

A Little Extra from DMC & Isabel's Birthday Card!

There is an added bonus on Daring Cardmaker Challenge this week:

A fun, little extra dare :)
This one is Easy Peasy Happy Birthday Cards. You know the times when you've suddenly realised that you need a card and there is only enough time left to create something fast and simple (because you've left it until the last minute to start).
Well...the mid week little extra is just for you - create something fast and cute in advance so you aren't caught off guard with those last minute birthday cards ever again :))
Jacob has received an invite to Isabel's Birthday Party (incidentally the party is being held on his Birthday!) - one of his little friends at nursery, and I needed to make a card. And by fluke, it fitted very nicely with the DCM mid week challenge!
I inked the edges of the paper (Funky Fairy download) and card, cut the letters from very shiny silver card and then added the foam flowers. Really quick! Sorry the photo is a bit dark - it was chucking it down at the time!
  • Backing papers: Free download from Funky Fairies member page (download number 4)
  • Dies Used: Sizzix Round-a-Bout alphabet cut in shiny silver card
  • Embellishments: Funky foam flowers - available to buy from September

Tilda & Co Challenge 32 - Cold as Ice

I think I must be doing something right at the moment because cards are not taking me that long to make - everything is just falling into place!

The Tilda & Co Challenge 32 is

Cold as ice...
The sun is now drifting away very fast and soon it will be as cold as ice....
Using the colours Blue & white Only . Show us how cold your projects can feel this week.
The backing paper is from the beautiful Deep Blue collection from Vicki's blog and I printed it off so it would fit the cardstock perfectly. The pale blue snowflake backing card is a download from Mad About Cards (I think a freebie too) and is one I printed off last year with such good intentions and never used it! Tilda (from Jozza) has been coloured with watercolour paints and I've added a bit of silver glitter sparkle to her wings and shoes.

The snowflake is cut with my Sizzix die and from vellum with added white fibres around the points and a square blue blingy gem to hide the 3d foam pads underneath! The sentiment I found so I don't know where it came from and the ribbon threading overlay was sent to me by my fellow Funky Hand DT mate Kath. Blue grosgrain ribbon from my stash.

Tilda actually has a bit of a blue shiner - I was over zealous in daubing a bit of colour on her cheeks and must have had blue paint on my finger too! Ah well, its in keeping with the blue theme!
  • Backing paper: Deep Blue collection from Vicki's Blog and download from Mad About Cards
  • Image: Water coloured Tilda
  • Ribbon & fibres: Both from my stash (and previously Blackburn market)
  • Embellishments: Sizzix snowflake cut from transparent vellum

Wednesday 20 August 2008

Penny Black Challenge 10 - Ribbons

Well, I could not let this challenge slip me by could I??!!

The Penny Black challenge 10 is:

Ribbons
this week we would like to see ribbons on your project

Little ribbon and big ribbon!! The ribbon wouldn't actually tie very well, so with the use of double sided tape, glue and a bulldog clip I sort of twisted it and stuck it down. Again this time, I picked the papers and then coloured the image!! I bought the Dovecraft Ho Ho Ho papers in the 8x8 size last year and all I've done is look at them. Take them out of the packet and put them back. They are really nice happy papers but I've just not been able use them - nothing really screamed 'make me'! So I am quite pleased with my little self for finally using one sheet of the 72 stack! And a nice and quick card to make too - which is always an added bonus! Also added a bit of sparkle to the snowman.
  • Backing papers: Ho Ho Ho Dovecraft 8x8 papers with blue inked edges
  • Image: Skating Snowy coloured with watercolour paints, added silver 3d glitter paint and blue inked edges
  • Ribbon: Thin blue ribbon from B&M Bargains and red snowflake from Lynsey
  • Others: Dovecraft eyelets

Tuesday 19 August 2008

Cute Card Thursday - Soft Furnishings - Challenge 23

Over on Cute Card Thursday, the challenge this week is

Challenge 23
Soft Furnishings
you can use fabric, ribbon, stitching, buttons etc, anything you can find on the soft furnishings in the home ie curtains, cushions, sofas etc.

I've taken this one literally! The backing is actually fabric from a very posh sample book for cushions, curtains etc; I think the correct word is drapes. Hehehe! Came courtesy of my friend Shirelle. And because I was not really concentrating too well on cutting straight lines (I was watching the Olympics) I had to edge the fabric with glue to stop it fraying and then went over it lightly with 3d glitter glue.

Sumptuous ribbon from Lynsey's fairly recent clear out. Sizzix Christmas Trees cut from some very lovely gold sheen card bought from ebay some time ago which have also had the glitter glue treatment.

I have 2 big sample packs of the fabric, so I have a lot to go at. I've even been thinking that some of it would look quite fab as cushions..... who knows?! The old Singer may just come out of retirement (again) - last time it was for curtains for Jacob's room just before he arrived.... And I mended 3 pairs of jeans on Saturday with knee patches. Poor Samuel has waited that long for me to do the patches that the jeans no longer fit him! Jacob now has more jeans than he can shake a stick at!

  • Backing paper: Actually furnishing fabric!
  • Ribbon: From my stash via Lynsey
  • Embellishments: Christmas Tree (Sizzix) cut from gold card with 3d gold glitter paint

Monday 18 August 2008

DMC - It's a Wrap!

Hehehe! Still continuing the Christmas theme with the challenges! There is something I really like about this Pink Petticoat backing paper - not something I would normally use for Christmas, but as soon as I saw it I knew exactly what I was going to do with it!


The challenge for this weeks Daring Cardmakers is:


It’s a Wrap
No, not the kind stuffed with Chicken & Cesar Salad or the woolly kind you put around your shoulders to keep you warm, mind you, the way our summer is going I think we could all do with one of those!I would like you to give your card a coat made of acetate, vellum or anything for that matter.As long as it ‘wraps’ around the outside of your card, anything goes!


The paper is the black collection from Pink Petticoat - Doodle-icious Christmas Rainbow Collection, printed at the default setting. I've lightly inked the edges of the card with silver stamping ink and the ribbon I bought a while ago from Clark Craft supplies - its actually sheer black organza with little sparkly bits (the photo doesn't really show it!) And the fairy lights have been cut from my Quickutz die using metallic card, glued to the fine wire and then sparkling gems added as it seemed a bit flat.


Surprisingly quick to make!

  • Backing paper: Black collection from Pink Petticoat Doodle-icious Christmas Rainbow Collection
  • Ribbon: From Clark Craft Supplies
  • Die Cutters: Quickutz fairy lights with added gems

Sunday 17 August 2008

Stamp Something Challenge - Summer Somethings

Well, there was no way I could turn this challenge into a Festive themed one!

The Stamp Something challenge for this week is:

Summer Somethings

So for this week's challenge we want you to create a project to remind you of something from the summertime

So here is a summery and fun card! And another card which was surprisingly quick and easy to make! The stamped image is from Jozza and I've used watercolour paints to colour it. Its been layered onto the dotty paper and then onto hot pink card to give it an edge. Funky foam flowers are my creation and available to buy from September.

  • Backing paper: Simply Cards & Papercrafts magazine issue 48 freebie
  • Image: From Jozza and coloured with watercolour paints
  • Ribbon: From my stash
  • Embellishments: Made by me and available to buy from September

Arty Girlz Challenge 47 - No Patterned Paper!

Yes, I'm still continuing my crusade to make all my Christmas cards via challenges! This one was very much inspired by Carol - so thank you!

This week, the Arty Girlz Challenge is:

This weeks challenge is 'no patterned paper' eek but don't panic too much because this doesn't mean that you can't make your own patterned paper using stamps or doodling or from other resources etc it just means NO shop bought designer patterned paper so go and have fun :)
And this is what I came up with! The backing vellum has been embossed with the Cuttlebug Snowflake folder and the edges of the card have been glittered with Anita's 3d glitter paint in silver. I've added a Sizzix cut snowflake (cut from the same card stock) which has been dotted with silver gel pen and then seed beads and wire have been threaded through the holes. This has been attached to the card with acetate, and to give the snowflake a bit of weight, I've added a little purple bell on the end. Which yes, does jingle!

Backing paper: Translucent vellum embossed with the Cuttlebug Snowflake folder
  • Embellishments: Snowflake cut with Sizzix die, with wire and seed bead embellishment and added purple bell (from Lynsey)
  • Extras: Acetate and Anita's 3d silver glitter paint from stash
  • Swim Like a Duckling!

    And here is Samuel with his Duckling Swimming Award certificate and badge! Sorry for the weird photo, but he was moving the certificate and badge when I pressed the shutter!!

    He's now started his second batch of lessons and with a bit of luck he'll be able to swim unaided by the end of it. I succumbed and bought him some ear gobbles which he proudly wore for the first time yesterday after I'd managed to loosen the straps so he would not be left with permanent red rings around his eyes.

    He still won't put his face fully in the water so we are practicing each night in the bath. Must remember not to put as much bubble bath in the water....

    Saturday 16 August 2008

    Blooming Marvellous!

    I while ago I entered Sarah's competition on her blog to win some beautiful strawberry earrings. And I am such a numpty, I forgot to check to see if I was lucky! Anyway, eventually I did and found that I had!! So I apologetically emailed Sarah who was very lovely and understanding and she popped these little beauties in the post to me:

    Can you guess what it is yet?!


    Ta-dah!! How sweet are these?!!

    Very similar earring and others can be bought from her website. And just have a look at one of her newest creations - the button pins. I think they are fantastic!!

    Thank you Sarah!

    Friday 15 August 2008

    Nursery Thank You's & Carol's Sketch Number One!!

    What a good idea this is!! My Funky Hand DT mate Carol has decided to have a go at setting a design sketch:

    "Like many of you, I enjoy working from a sketch! So I decided to have a try at one of my own, and here it is!"

    This is her first challenge and isn't it fab?!

    As you've probably realised, I'm getting addicted to these challenges, but I'm trying to be a bit more savvy and to turn the challenge to my advantage! This time I've got thank you's to make for some staff at nursery as Samuel is due to leave on 4 September. So, I thought, (it was a light bulb moment!) I'll combine the two!


    The photo was taken at Easter after we'd spent time making bonnets (well, they are boys and turned out as crowns!) Its been layered onto paper (which was a perfect match for the backing paper colours!) along with Now That's Funky backing papers printed at A5 size so the pattern was not too big. I really do like these stripes and the random circles - I always want to print these patterns off even if I don't want to! The sentiment I made using the computer and the backer is also from Now That's Funky. All edges have been inked - and that is also becoming an addiction!

    I did think about using ribbon but changed my mind as wanted to keep it simple! Only another 5 to make....

    Watch out for the 'special' thank you's I'm in the process of making!

    • Backing paper: Cold Walk collection from Now That's Funky by Funky Hand
    • Brad: Making Memories