
And that's not all! Have you ever had a great idea for a Birdbrain image? Well, this is your chance! One lucky winner randomly selected from all the comments left on the FTHS blog will be selected to work with Faith to design a Birdbrain image!

As you hop from blog to blog, if you like the look of the tutorial you can recreate it and don't forget to use a FTHS and your favourite Birdbrain image - just link your blog up with the InLinkz code at the bottom of each blog post as a random link will be picked to win my creation!
I've made a simple Tee-Pee card using one of my favourite FTHS images - Birdbrain Balloon - and coloured it with Promarkers and then cut it out.

Next, I printed Sassy Designs - Primary onto some thick cardstock - you will need three 11cm square peices. Sign up to the newsletter on the website as you'll get to hear of the fantastic sales where the digi paper packs are reduced to 99cents!
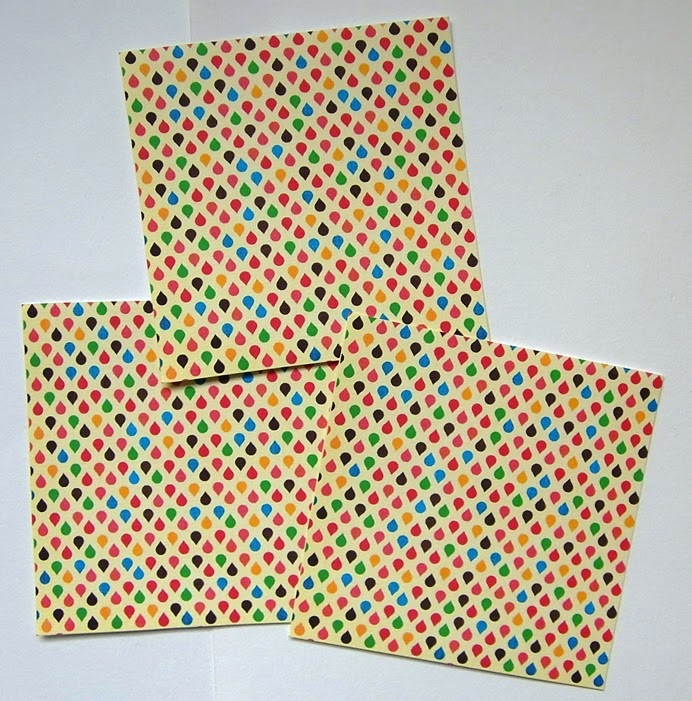
Score diagnally across each of the three squares to create a valley fold on the non-printed side. I've also inked all the edges with a brown Whispers inkpad (cheap and cheerful!)

To construct the Tee-Pee, lay the three squares as shown - overlapping each one. Double check that it will all fold together before you glue it, just in case (you can always trim the edges if needed to make it fold flat)

Stand the card up and embellish as desired with your favourite FTHS image! I've also added glossy accents to the balloon and eyes. And I've replaced the balloon string with an offcut of bakers twine. To keep the card shape when its stood up, I've added a button which has a foam pad underneath so that the flap rests on it and keeps it all closed. Alternatively, you can add a brad.

Back to the blog hop! If you have arrived from Joanna, you are in the right place, if not why don’t you start on the From the Heart Stamps blog, so you don’t miss anything. Don't forget to leave me a comment before you hop over to Angela to see what she's created.
Thanks for hopping with us today. The hop will end on Sunday 14 September at 6am, EST. Winners will be posted on the From the Heart Stamps Blog on Wednesday 17 September.
Good luck!
< div class='InLinkzContainer' id='438433' > An InLinkz Link-up< !-- end InLinkz script -->
How fun Ruth. Love this technique, I have never made one of these before. Cute.
ReplyDeleteHi Ruth, how lovely to have you guest with us :)
ReplyDeleteI haven't made a tee-pee card before, and after seeing your card, I'm so going to give this a try!
Outstanding colouring too ;)
Jo xx
Great looking party project and awesome birdie, :)
ReplyDeleteOMG How cute is this! Love your colouring
ReplyDeleteMyrna
What a cute and fun card! Great tutorial, you made this look easy...I may have to try it!
ReplyDeleteoh Ruth, this is adorable! and thanks for showing how you made it. I have always wondered. the balloon looks so cute drifting away on the string!
ReplyDeletetake care and have a great weekend! :)
How cute is this idea?!!
ReplyDeleteWow, Ruth this is stunning. Love this fold, going to give it a go for sure. Beautifully colored, too and love the baker's twine accent.
ReplyDeleteYour card looks very nice:)
ReplyDeleteThis is so cute! I love the teepee shape...I've never tried one before! Darling image, it's a cutie!
ReplyDeleteSuch a sweet card! And what a great tutorial too.
ReplyDeleteLinda
What a fun tutorial Ruth! So glad that you have joined us this month!
ReplyDeleteHugs, Kelly
Awesome coloring - one of my favorite Birdbrains! Ans how much fun is this card fold - I have got to try this!! Thanks for the inspiration!
ReplyDeleteLyn
Not sure if my comment went through as I was having some trouble getting the link to come up - so this might be twice - love your technique on this card - never have tried this and will have to for sure - TFS - have a blessed week!
ReplyDeleteThis is new to me, so neat how it stands up. Great coloring too!
ReplyDeleteNever made a Tee-Pee card, but it looks great. Love what you did with the image. I love the Birdbrain images.
ReplyDeleteHugs,
Kitty
Ruth, i´ve never made a Tee-Pee card but as i saw yours i think i will give it a try. It seems to be very easy. Thanks for your great tutorial and your lovely card.
ReplyDeleteGreat to have you as our guest @ From the Heart Stamps !!
How cute! I've never seen or made a teepee card before. What a fun design.
ReplyDeleteWhat a fun fun project. I have done just one of the teepee cards and yours is super adorable and you have inspired me to do another now.
ReplyDeleteHow neat.
ReplyDeleteYou could make a HUGE one as table centerpiece.
This is super cool.
Em
This could be a great hat too! Great idea and really fun. TFS.
ReplyDeleteHow fun! I've never seen a tee-pee card before. Thanks for sharing!
ReplyDeleteOh, this is so cute. What a great centerpiece for a table.
ReplyDeleteThis is really cute, great job.
ReplyDeleteOh my how great is this, great tutorial and beautiful card!
ReplyDeleteWow! First of all, your coloring is amazing!! I have never seen a tee-pee card...so cool!! Thanks so much for being a part of our team and blog hop!!
ReplyDeletewhat a fun card design!
ReplyDeleteVery fun card!
ReplyDeleteGreat idea I haven't tried the teepee fold yet but u did a great job!
ReplyDeleteSuch a cute image! I will try that teepee fold - thanks so much for sharing it!
ReplyDeleteI've so GOT to try this. Thanks for the tutorial. The image you used is perfect for this technique!
ReplyDeleteWhat a cool shape, it's so much fun!
ReplyDeleteLove this idea! Will definitely have to try it. Great colors, too!
ReplyDeleteI adore this teepee card! I don't think I've come across it before! It's fab! Love the image and the paper really is lovely. May just go and sign myself up to their website!
ReplyDeleteOh My! This little critter is sooo funny! He could be a tad happier lol..but, he sure is fun.
ReplyDeleteFABulous colourings and design..LOve it.
Chrissyxx
Wow Ruth,love this shape of card.Your tutorial is so clear that I must try this card shape again.Inspiring.Love the image too.Hugs Debbie x
ReplyDeleteReally creative folded project. That birdbrain is so cute too!
ReplyDelete