Showing posts with label simple doodles. Show all posts

Friday, 31 December 2010

Simple Doodles Challenge 34 - Embossing

Welcome to the last Simple Doodles challenge of 2010! We've also had a name change and will be called Simply Create Challenges! The challenge this fortnight is:

Embossing

I've used one of the images from Robyns Fetish that the DT were given for the last challenge and yes, I have made a very early start on my Christmas cards for 2011! How organised will I be come next December?! I've used the There's Snow Place Like Snow Home digi image which has been coloured with Promarkers.


I've layered it onto some black and red card that I had in my stash along with some off-cuts of white card stock that I ran through the Swiss Dots embossing folder. The red organza ribbon is from my stash.

I am feeling quite virtuous in making such a good start for next year! Probably won't last though!

The challenge is open until 13 January and good luck! Hope you have a wonderful 2011 with lots of good surprises along the way!

  • Image: Robyn's Fetish, coloured with Promarkers
  • Dies: Swiss Dots embossing folder
  • Everything else: My stash

Thursday, 30 December 2010

Pink Winter Birthday

The Lexi's Creations challenge is:

Pink Winter Birthday

So, in my quest to use up all the scraps in my overflowing shoe box (and its a big box as my husband takes size 13!) I managed to find these offcuts which I am sure are from a Funky Hand cd (or maybe two!) The image is from Simple Doodles and I've coloured it with Promarkers. I chopped the loopy bits off the top of the image and added some random bits of black and hot pink ribbon instead to make it more tactile.


The spotty organza ribbon across the centre was a perfect size for the card! I didn't have any more and it was a shame to waste so it had to be used!

I've used a sheet of acetate as the card base which was another light bulb moment - two in one week!!

  • Backing papers: Funky Hand
  • Image: Simple Doodles, coloured with Promarkers
  • Everything else: My stash

Saturday, 18 December 2010

Simple Doodles Challenge 33 - Tag It

Welcome to another Simple Doodles challenge! This fortnight is extra special as we have a sponsor - Robyn's Fetish has provided the Simple Doodles design team with some lovely images to help provide you with some inspiration for the challenge:

Tag It!

I've used Lucy Angel on my tag and have coloured her with Promarkers plus a little glitter glue on her heart. She is then layered onto a Sizzix Super Scallop sized tag that has been embossed using the Cuttlebug D'vine Swirls folder and inked.


The brown and pink (it is honest - the photo has a blue cast!) is from a 12x12 sheet from my stash and it does not have a maker name on it. The pink tag is from Funky Daze from Funky Hand and I've dotted liquid pearls around the edge. The edge of the card has been faux stitched.

The ribbons are from my stash. Good luck - the deadline for the challenge is 30 December via the Simple Doodles challenge blog!

  • Papers: From my stash and Funky Hand
  • Image: Robyn's Fetish coloured with Promarkers
  • Everything else: My stash

Friday, 3 December 2010

Simple Doodles Challenge 32 - Photo Inspiration

Welcome to another Simple Doodles challenge! The theme for the challenge is a photo inspiration:

As you can see, I've focussed in on the candles as they are a striking teal colour! I've used the Simple Doodles monster and sentiment as my focal point, and he's been coloured with Promarkers and attached to the card base with a strip of acetate so he boings around!

The brown kraft type backing paper is actually a sheet of brown paper that I recycled from some packing. All the papers are from a mega 300 sheet double sided case of 12x12 papers from a company called MemoryStor that I picked up from CostCo. My brother took me for a quick shopping trip a few weeks ago and I just happened to spy the case! All for just under £23.50 too! It works out at 8p a sheet which I think is a real bargain!

Good luck if you enter - the deadline is 17 December.

  • Image: Simple Doodles, coloured with Promarkers
  • Sentiment: Simple Doodles
  • Papers: 12x12 double sided papers from MemoryStor

Saturday, 20 November 2010

Simple Doodles Challenge 31 - Cute as a Button

It's time for another Simple Doodles Challenge! Kelly has joined our little but perfect team - so hello Kelly! The challenge theme this fortnight is:

Cute As A Button

Which this image certainly is! The Design Team have been sponsored for the challenge by Zlatoena Designs, however, me being me and being organised I'd already made my card and didn't have enough time to make another with the wonderful images supplied. So, I'll be making cards with those over the next week or so (I WILL make time!) and I'll show them. So apologies from me.

Moving on! The image I've used is from Digi Sparkle and is part of the Christmas Girls set. I am such a fan of Heathers images as they are a delight to colour and are modern but retro all at the same time! Isn't this a cutie?! Coloured with Promarkers with a blob of red glitter glue on the holly. Paper is DCWV 6x6 Christmas Wishes paperstack which has been inked around the edges and I've added thin satin ribbon and some buttons from my stash.

This is also one of the images you could win as part of The Digi Blog hop - click here for more details but be quick - hopping ends on 25 November!

Hope you can join in with the Simple Doodles challenge this fortnight - good luck!

  • Backing papers: DCWV 6x6 Christmas Wishes
  • Image: Digi Sparkle Christmas Girls, coloured with Promarkers
  • Everything else: My stash

Saturday, 6 November 2010

Simple Doodles Challenge 30 - Lace and Pearls

Time for another Simple Doodles challenge! This fortnight the challenge theme is:

Lace and Pearls

I've made a 60th Birthday card in the shape of a bottle using my own template. The top of the bottle is silver 3d paint which I've randomly sqwidged around (yes, that is a word!) I've glittered the sides of the bottle with glitter glue, added the printed text (pc) as the label and then decorated the top of the bottle with ribbon, pins with pearls, string of pearls and some lace.

I've also computer generated the sentiments and attached them under all the ribbons etc.

Good luck and hope you enter the challenge! The challenge is open until 19 November and you can link up your creation via the challenge blog here.

  • Bottle template: My own
  • Text and greetings: Computer generated
  • Everything else: My stash

Saturday, 23 October 2010

Simple Doodles Challenge 29 - Shape It!

Welcome to another Simple Doodles Challenge! This fortnight the brief is to make

A Shaped Card

So no 'normal' shapes are not allowed! I've used the gift card from Polkadoodles Paper Boutique Vol 2 - Creative Christmas. This is the A5 size and I've cut out all the shapes and layered them up plus added some glitter glue here and there for sparkle!

The sentiment is also from the same cd and I've tied it to the candy cane with sparkly string.

The challenge is open until Friday 5 November when the next one is set. Good luck!

  • All paperbased items: Polkadoodles Paper Boutique Vol 2 - Creative Christmas
  • Everything else: My stash

Sunday, 10 October 2010

Simple Doodles Challenge 28 - Winter Warmers

Welcome to another Simple Doodles Challenge! The challenge this time is

Winter Warmers

I've used one of the decoupaged A5 images from Polkadoodles - Paper Boutique Vol 2 - Creative Christmas.I've printed all the layers off and then simply layered them up so it is sort of decoupaged, but not in the traditional sense! I've added glitter glue to the tops of the star cookies and seed beads to the marshmallows. The backing paper is also from the cd too.

The ribbon is from my stash (my Mum recycled it for me!) and the sentiment is from the same cd.

Hope you can join in with the challenge - it is open until 22 October so plenty of time!!

I'm, for some reason, a bit late with posting this - I'd prepared the post ages ago as I like to get ahead with my Design Team commitments and then forgot to set it to publish and saved it to draft, so just found it waaaaaayy down my list..... sorry girls!!

  • All paperbased elements: Paper Boutique Vol 2 - Creative Christmas from Polkadoodles
  • Everything else: My stash

Saturday, 25 September 2010

Simple Doodles Challenge 27 - Photo Inspiration

Welcome to another Simple Doodles challenge! This time we have a colour inspiration picture for the challenge and it is:

I've used a Delicious Doodles image, coloured with Promarkers. I've layered it onto some card from my stash and then used papers from the Kirsty Wiseman Patti Picklicious cd which matches perfectly!


I've added some natural raffia that I found in my stash (have a rather large bundle which I recycled from a lovely flower arrangement that I got last year) and added three brads to finish the balance of the card.

It's the first time I've used one of these Delicious Doodles images - this was a freebie, and it was lovely to colour!

Hope you can join in the challenge this fortnight - you have until Friday 9 October to join in!

  • Backing papers: Patti Picklicious by Kirsty Wiseman cd
  • Image: Delicious Doodles, coloured with Promarkers
  • Everything else: My stash

Friday, 27 August 2010

Simple Doodles Challenge 25 - Back to School!

A great challenge this fortnight for Simple Doodles:

Back to School

I've used an Inktegrity image, coloured with Promarkers with added wobbly eyes and have layered the image onto bright squares of card.

The added embellishments I've had that long that I've lost the packaging! I've used some red embroidery thread to tie the bow through the star and also across the middle of the card.

Hope you are able to join in with the fun - the deadline for challenges is Friday 10 September and the top three from that challenge are revealed the week after. Good luck!

  • Image: Inktegrity, coloured with Promarkers
  • Everything else: My stash

Saturday, 14 August 2010

Gift and Twine

A lovely simple sketch for Card Positioning Sketches challenge this week:

And I've used a Simple Doodles digi image which has been coloured with Promarkers. I've used Bazzill basics green backing paper and some other stuff that I bought from Harrogate in March last year that looks a bit like swiss dots. It probably has some fancy name but it escapes me at the moment!

I've added some chunky green brads and a blue one on the gift, a little bit of doodling around the edges of the layering and then added some garden twine.

Simple but manly card all the same!

  • Image: Simple Doodles
  • Everything else: My stash

Simple Doodles Challenge 24 - Celebrate!

It's time for another Simple Doodles challenge! Hope you enjoyed the 'Out of the Box' theme for the last challenge! Today and running for the next two weeks is the theme

Celebrate

I've used a Simple Doodles digi stamp which has been coloured with Promarkers and I've added a little gem to the top of the present stack.

All the papers are from Funky Daze from Funky Hand and were in my bits box so I've used left overs from previous projects. Should do that more often as the box is getting a little full! I've raised the image onto foam pads so it stands out a little more along with the sentiment (think it's an Anita's stamp)

And the lovely pink with white polka dots ribbon is from Fantastic Ribbons (check out their site if you like ribbon but don't blame me for any purchases!)

Good luck if you decide to join in with the challenge - you have until Thursday 26 August to enter!

  • Image: Simple Doodles, coloured with Promarkers
  • Papers: Funky Daze from Funky Hand
  • Ribbon: Fantastic Ribbons
  • Sentiment: Anita's stamp (I think)

Friday, 30 July 2010

Simple Doodles Challenge 23 - Out Of The Box

It's time for another Simple Doodles challenge This fortnight the challenge is:

Out Of The Box

And I have taken it literally (to be honest I didn't consider anything else!) I've made these three cute exploding boxes. Not sure if they are proper exploding boxes but they are using my own template and sizing and worked fine for me!

I've used Funky Hand - Funky Daze papers and three different collections but the same patterns for each - Funky Hand papers have different collections of papers with different colours but the same patterns so if you like the pattern but wanted it in blues - no problem!

The top of the boxes show off 4 flowers on each corner made with my Cuttlebug flower die plus matching Card Candy from Craftwork Cards.

The boxes are quite dinky and they each have an inner layer which shows off yet more scary photos of Jacob! These three have been made for his three main people at nursery as a thank you for when he leaves at the start of September prior to starting school. I've got one more to make for Karen the cook but that one will be from both boys as she's been the cook from the nursery being built and her creations are always well received by the boys!


This one is for Rachel who was Jacob's key worker for the last 2 years and she's recently been promoted to full time Manager to cover maternity leave. Various photos of Jacob and some of him with Samuel from being less than 24 hours old (far right) to mid June (pic in middle with Rachel). The devil photo was taken at nursery when he was 2 and he had his face painted and it lasted all day - he didn't smudge it at all, and it was all glittery too! Mind you, it stayed for a few days after too! The very bottom photo is from a Farmer Ted's trip 2 years ago with nursery when all our kids wore wellies and no-one else did.....!!

Anyway, a bit of corner rounding and some doodling and they are complete - really quick to make once I got going!

Hope you can join us on the Simple Doodles challenge this fortnight - pop over to the challenge blog for more details on how to enter! Good luck!

Friday, 16 July 2010

Simple Doodles Challenge 22 - Sketch

Welcome to another Simple Doodles Challenge! This time it's a sketch:
And here is my sample! I've used a Simple Doodles image and coloured it with Promarkers. The backing paper is DCWV Text Print 6x6 stack which I bought ages ago (it was half price!) but hadn't even used it! I've inked the edges after adding it to the card blank.

I've used a Nestabilities die to cut the shape behind the turtle and added ribbon from my stash.

The snaps are WRMemory Keepers and because the card blank is not thick enough, and I didn't add a shim behind, they spin round. Which is obviously intentional!

The lettering is cut using my Baby Face Cuttlebug alphabet set. I've added a wobbly eye to the turtle - the boys helped me decide which size was best. He did at one point look slightly scary with a huge eye!

Good luck in entering the challenge! Pop over to the challenge blog for more details and how to enter, you have until Thursday 29 July to enter!

  • Backing paper: DCWV Text Print 6x6 stack
  • Image: Simple Doodles, coloured with Promarkers
  • Dies: Spellbinder Nestabilities, Cuttlebug Baby Face alphabet
  • Snaps: WRMemory Keepers
  • Ribbon: My stash

Saturday, 3 July 2010

Simple Doodles Challenge 21 - Holiday's

It's time for another Simple Doodles Challenge! This fortnight the challenge is:

Holiday's

And I've used this sweet Simple Doodles image of Santa, coloured with Promarkers and glitter glue. I've made a Christmas Savings Jar - a good idea in theory but probably not in practice! I've re purposed a pasta sauce jar and added a handcut label using silver card and Funky Hand papers plus ruby red ribbon.


Despite colouring the image quite some time ago, I was lost for inspiration until I saw the jar waiting to be recycled!

Hope you can join in the challenge! Pop over to the challenge blog for more Design Team inspiration and to enter. Challenge is open until Friday 16 July - good luck!

  • Image: Simple Doodles coloured with Promarkers and glitter glue
  • Papers: Silver card from my stash, other from Funky Hand
  • Ribbon: From my stash

Saturday, 19 June 2010

Simple Doodles Challenge 20 - Summer Fun

It's time for a Simple Doodles challenge! This week the theme is:

Summer Fun

I've used a cute little image from Michelle Perkett Studio which I received as part of the 50 / 50 Stamping Group. I've coloured it with Promarkers plus a little glitter glue, which because the photo is a particularly poor one, you cannot see too well!

I've used papers from Funky Daze - which I printed when my ink was running out so they do not show their true colour! I've added some ribbon from my stash - generously donated by Lynsey some time ago! Plus I've added some hat pins which I've added my own beads to.

Such a cute image and a great challenge too! Pop over to the challenge blog for more details - you have two weeks to enter so even better!

Good luck!

  • Backing papers: Funky Daze from Funky Hand
  • Image: Michelle Perkett Studio, coloured with Promarkers and glitter glue
  • Everything else: My stash

Friday, 4 June 2010

Simple Doodles Challenge 19 - Only For Dad

Welcome to another Simple Doodles Challenge! For the next two weeks the theme is:

Only For Dad

So great chance to make a Father's Day Card!

I've used a Simple Doodles digital image which has been coloured with Promarkers. I've used papers from Funky Daze (quite possibly one of my most favourite collections - Son Day!)

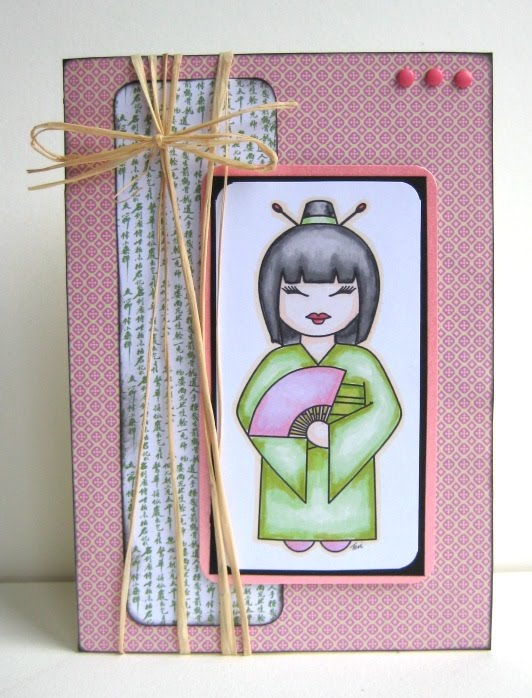
The snaps are WR Memory Keepers and I bought around 35 packs for under £8 earlier in the year and had forgotten I had them (well, they are in a box under the table!!) so thought I'd better start using them! The jute string is from my kitchen drawer and the sentiment is computer generated.

Hope you can join us in the challenge - pop over to the challenge blog for more details and good luck! Challenge is open until Thursday 17 June at midnight US time.

  • Backing papers: Son Day collection from Funky Daze
  • Image: Simple Doodles coloured with Promarkers
  • Snaps: WR Memory Keepers
  • Everything else: My stash

Sunday, 30 May 2010

T-shirt Transfer Tutorial

Here is the t-shirt transfer tutorial I promised! I did try and get it all ready before we went on holiday last weekend but despite spending over an hour trying to sort out the photos, Mr Blogger was just not playing and either kept loosing the photos or putting weird code in their place! Hopefully, this one will work!

The t-shirt transfer paper was generously sent to me by Photo Paper Direct who asked me to test the product and blog about it! And because I enjoyed making the first t-shirt I decided to turn the second t-shirt into a tutorial!

To begin, take a sheet of the t-shirt transfer paper. It comes in a pack of A4 and you can buy 20 sheets for around £8 (the budget pack is cheaper!) I used a kids plain white t-shirt that I pre-washed (bought 2 from Primark for less than £2). You will also need felt-tips or another colouring medium - do not use Promarkers as these take the surface off the paper. Copics are probably the same. Also, a sheet of greaseproof paper, a domestic iron, a surface that will withstand your iron on the hottest setting (do not use the ironing board!) and of course a digital image!

I used the sweet dino image from Simple Doodles (I'd previously asked permission to use it), decided on the best size and within Word I flipped the image so that when it was ironed onto the t-shirt it would be the correct way round - very important if using wording!

When I came to print the image onto the transfer paper, I selected the correct setting, however I didn't use this for my first t-shirt - I simply printed it as normal and it worked fine!

Here is the dino waiting to be coloured!

These are the felt-tips I used to colour my image - bought from Tesco for around £2.50.

And here, I've started to colour the base colour of the dino. I selected a pale colour to begin with and then built up the depth afterwards. Take care not to 'scrub' at the image as the surface will disintegrate.
I didn't leave enough time for the different colours to dry, so I experienced some 'bleeding' with the red. But I quite like the effect!

Once the image has been coloured cut it out leaving a fine border around the image - if you leave a wide border it will be more noticable once the image has been ironed onto the t-shirt.


Place the image coloured side down onto the t-shirt where you want it to be. You may want to use a small peice of sellotape to keep it in place if its easier. Apologies for the photo being the wrong way!
Now set your iron to its hottest setting and once upto temperture iron the image onto the t-shirt by using small round motions ensuring the whole of the image is covered. Do this for around 2 minutes and the backing paper will turn brown.

Leave the image to cool completely - you have enough time for a cup of tea and a hob nob! Once completely cool, carefully peel the backing paper from the image. Take care to peel it away in one full peice otherwise you may damage the image underneath.

If you prefer your transfer to be shiny then you can finish at this point and simply leave the t-shirt for 24 hours before washing it inside out.

However, if you want the image to appear matt, then place the sheet of greaseproof paper over the image and iron it, again on the hottest setting for around 30 seconds. Whilst the paper is still hot, peel it away.

The image underneath is now matt finish.

Leave it all to cool and wash the t-shirt inside out 24 hours later. It can either be tumble dried or left to dry naturally.

And here you have the finished t-shirt modelled by Jacob! He was looking most pleased as I had just bribed him with ice cream and chocolate sauce - after the photo shoot of course!!


If you want to use a pre coloured digital image then the same steps will be followed just without the colouring. I am really impressed as to how easy the t-shirt transfer paper was to use and I have a feeling that I will be buying a pack of the paper as I have more ideas on how to use it! If you want to use it on canvas bags, then Photo Paper Direct also sell them!

From start to finish, the whole process took around 2 and a half hours although I staggered it over 2 days. Please remember to ask permission from the digital artist before their image is used.

Thank you to Photo Paper Direct for sending me the paper to use and for asking me to try one of their products (I feel like I really have made it in the blogging and crafting world!) and also to Trish for allowing me to use her very cute dino!

Saturday, 22 May 2010

Simple Doodles Challenge 18 - Anything But a Card

It's time for another great Simple Doodles Challenge and this time I've set the challenge!! Which is:

Anything But A Card

A while ago I was contacted by a representative from Photo Paper Direct asking me if I would test and review some of their products. I was sent a sample of magnetic photo paper, sticker sheets and also T-shirt Transfer sheets. So far I've only used the T-shirt transfer sheets and here is what I made!

Apologies for the gappy toothy child but I needed a model! The sheet was really easy to use - I simply printed off the digital image I wanted (remembering to flip it to mirror image) and then coloured it with felt tips. I did try and use Promarkers but the surface of the sheet disintegrated.

After I'd finished colouring I cut around the image leaving a thin border. I then ironed this flat onto the t-shirt until the iron icon changed to brown.

Once it had cooled down I peeled off the backing sheet and then re-ironed it with a sheet of greaseproof paper between the iron and t-shirt. Left it for 24 hours and then washed it, inside out, and then popped it in the tumble drier.

Easy peasy!!


As you can see, the colours are really vibrant on the image! So not only have I managed to use the iron (on two separate occasions) I've also created friction between the boys as they are now fighting over who has the t-shirt!

So check back over the weekend as I plan to use the second sheet I was sent to make another t-shirt transfer and this time I'll blog it as a step by step tutorial. Edited to add - the tutorial will follow next weekend as Mr Blogger has really messed up my pictures and I'm on the verge of going on holiday and have not got enough time to sort it out!!

You can buy the packs of t-shirt transfer paper for just under £8 for 20 A4 sheets, and their service is fantastic!

Back to the challenge!! If you want to enter and need some inspiration, head over to the Simple Doodles Challenge blog - you have until 3 June to enter - good luck!

  • T-shirt: Primark for two t-shirts
  • Image transfer paper: Photo Paper Direct, coloured with felt-tips

Friday, 7 May 2010

Simple Doodles Challenge 17 - Thinking of You

Time for another Simple Doodles challenge! These are such lovely challenges and you can use anything from your stash to enter, although if you have a look on the blog, there are loads of freebies you could use!

The challenge for this fortnight is:

Thinking of You

I've used this freebie ice cream cone image which I've coloured with Promarkers and added a bit of glitter glue to the dollops of ice cream and also the cherry. I've cut the image and layers with my only set of Spellbinder Nestabilities (I really must get some more but can never decide which ones to get!)

The red card is from my stash and it is a lovely textured thick card. The printed paper is from The Big One stack from the Clare Curd Signature Range. And the ribbon is from my stash.

Hope you can enter the challenge - deadline is midnight PST time (about 6 hours behind the UK) on 20 May. Good luck!

  • Backing papers: Red card from my stash, printed from the Clare Curd Signature Range
  • Image: Simple Doodles freebie coloured with Promarkers
  • Dies: Spellbinder Nestabilities
  • Ribbon: My stash