Showing posts with label jack. Show all posts

Friday, 23 October 2009

Polkadoodle Challenge 23 - Halloween

It's Friday again so its another Polkadoodle Challenge!

This week, Nikky has asked us to use the Halloween download and to get creating!

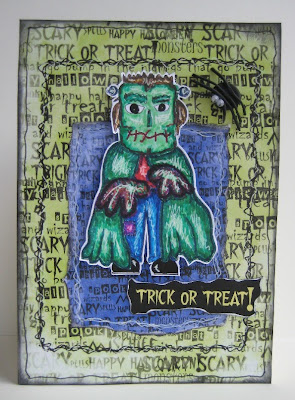
This had to be a quick one this week for me due to the lurgy earlier in the week. I've used Frankenstein Jack - layered onto the backing paper. I've liberally inked the edges with my good black ink pad and then added the sentiment.

The bats are table confetti from my stash.

Told you it was a quick and simple one this week! You have until 12noon on Sunday 1 November to enter the challenge - good luck!
  • All paperbased elements: Halloween download
  • Bats: From my stash

Friday, 25 September 2009

Tutorial - Digi Colouring with Watercolour Pencils

And here is the second tutorial to accompany this weeks challenge!

My equipment is very basic! These are the watercolour pencils (24) that I use and also the brush felt tips (30). The watercolour pencils can be used as ordinary pencils, but they really come to life when a tiny bit of water is added.

For this tutorial I am colouring Polly Polkadoodle from the Halloween download. I've started with a light and pale layer of colour.

I've now added more definition to Polly's hat by dipping the nib of my pencil into water - I can now spread the colour more easily and also choose which areas I want to leave as highlights.


To build up more intense and darker colours, I've used not only the blues but also greens and purples. I would not use the black at this point as to go too dark too quickly may spoil the overall effect.


The same technique is then applied to her cape. Colour is built up slowly with greens, browns, blues and reds.

Other smaller areas are now coloured.


And only now (below) have I added a tiny bit of black here and there to provide a darker contrast to the colour. However, it is really the colour and it's depth that I want to portray which I feel provides a richer and deeper colour than using black as this can be a very flat tone.


And here are the two images together that I coloured for these tutorials. Same technique applied to both images but different results due to the medium used.


And this is the card I made with the Polly Polkadoodle image. Papers are also from the Halloween download and the little fimo spider is made by me!


Hope you've enjoyed the tutorials and that you will be able to join in with the challenge this week!

Tutorial - Digi Colouring with Felt Tips

Here is a tutorial to accompany this weeks challenge. There will be another tutorial published just after this one which uses a different medium to colour a digital image.

My equipment is very basic! These are the watercolour pencils (24) that I use, and also the brush felt tips (30). I use the brush felt tips as the hard nibbed ones tend to 'scuff' the paper and are not as easy to blend with the different shades.

My two images that I'm colouring - Jack and Polly Polkadoodle from the Halloween download.

I've started off with Jack and the felt tips. By using a pale blue felt tip, I've coloured his jeans. This is now my base colour upon which I will add darker colours for shadowing.

I've then 'dotted' darker shades of blue on top of the initial block of colour - this is now providing shadows and form and it also helps to stop some of the hard lines that you get when using felt tips as they don't blend too well, but with this technique, it's not quite as noticeable.


Once the jeans are completed, I started on Jack's cape. Again, I added the lightest green I wanted as my base colour.

And slowly built up the shadows - the paler green stays as the highlights.


Once I'm happy with the cape, I then start on other smaller areas - I've coloured his t-shirt and started on his creepy gloves. Again, I've used the same techniques.

I've started to add different colours such as purple, blues and reds to build up more definition and to extend my colour range.

Next the hair and mask are coloured.

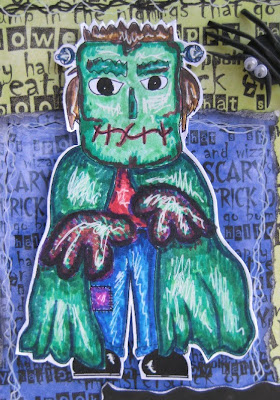
And for extra highlights, I've used a white gel pen and loosely but carefully scribbled over the top of the felt pen where I want highlights. This provides more definition.

I had a little helper whilst I was colouring the two images - Samuel was on his school holidays and sat with me and coloured his own Halloween Jack with his felt tips! Even though I've enlarged the image to fit an A4 sheet, there is no loss of quality - you can make the image as small or as large as you wish!

And this is the card I made with the image - I cut around Jack leaving a fine white border and layered him onto papers from the Halloween download. A bit of inking and doodling and he is complete! Plus the wobbly eyed fimo spider, made by me, of course!

The second tutorial on digital image colouring follows this post. Hope you enjoyed this one, and go and re-discover felt tips (these were half price in Tesco's - £1.25!)